
Thinking about installing an awning but unsure where to start? Accurate measurements are the foundation of a successful installation. Whether you want extra shade, weather protection, or a stylish outdoor living space, learning how to measure correctly can save time, prevent mistakes, and help you choose the perfect awning.
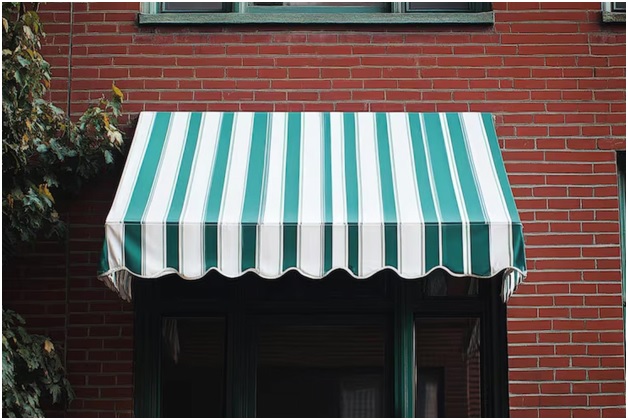
Adding a house awning to your property is one of the most effective ways to create a comfortable outdoor space while improving the appearance of your home. A well-fitted awning can provide shade, protect outdoor furniture, and help you enjoy your garden throughout the year. However, before choosing a design, colour, or operating system, accurate measurements are essential.
Many homeowners focus on the style of the awning first. Yet the success of any house awning installation depends on careful planning and precise measuring.
When measuring for an awning, you should think beyond the width of the area you want to cover. The available wall space, projection distance, obstacles, and mounting surface all play important roles in selecting the right solution.
Companies that specialise in residential awnings often provide a range of options, including retractable awnings, motorised systems, and custom-made designs tailored to different property styles. Proper measurements help ensure the chosen awning delivers the best possible performance and appearance.
Why Accurate Measurements Matter
Incorrect measurements can lead to several problems. An awning that is too small may not provide enough shade, while one that is too large could interfere with doors, windows, or nearby structures.
Accurate measurements help you:
- Choose the correct awning size
- Ensure safe installation
- Maximise shade coverage
- Avoid costly adjustments
- Improve the overall appearance of your home
Taking time to measure properly helps create a smoother installation process and better long-term results.
Tools You Will Need
Before you begin, gather a few simple tools.
These include:
- Tape measure
- Pencil and paper
- Spirit level
- Step ladder
- Camera or smartphone for reference photos
Having everything ready beforehand makes the measuring process quicker and more accurate.
Step 1: Measure the Width of the Installation Area
Start by identifying where the awning will be installed.
Measure the full width of the wall area above your patio, decking, terrace, or outdoor seating space. Record the measurement carefully.
Do not simply measure the width of the patio itself. Consider whether you would like the awning to extend beyond the seating area for additional shade and protection.
When selecting width, remember that awnings are often designed to provide broader coverage than the immediate space beneath them.
Step 2: Measure the Projection
Projection refers to how far the awning extends outward from the wall.
This measurement is important because it determines the amount of shade provided.
To calculate projection:
- Measure from the wall to the furthest point you want covered.
- Consider the position of outdoor furniture.
- Allow enough space for movement underneath.
- Think about the direction of sunlight throughout the day.
A larger projection generally provides greater shade coverage but requires suitable installation space.
Step 3: Check the Mounting Height
The installation height affects both functionality and appearance.
Measure from the ground to the intended mounting position. Most awnings require adequate clearance to ensure comfortable use and proper operation.
When measuring height, take note of:
- Door frames
- Window openings
- Roof overhangs
- External lighting
- Drainpipes
These features can affect where the awning can be safely installed.
Step 4: Assess the Wall Structure
Not every wall is the same.
The mounting surface must be strong enough to support the awning and its operating mechanism. While a professional installer will assess structural suitability, identifying the wall type in advance can be helpful.
Common wall surfaces include:
- Brick
- Rendered masonry
- Concrete
- Timber-clad surfaces
Take photographs of the installation area to help suppliers understand the property’s layout and mounting conditions.
Step 5: Identify Potential Obstructions
Carefully inspect the area around the proposed installation site.
Look for anything that could interfere with the operation of the awning.
Common obstacles include:
- Gutters
- Downpipes
- Outdoor lights
- Security cameras
- Ventilation outlets
- Window openings
Recording these details early helps avoid complications later.
Step 6: Consider Sun Direction and Shade Requirements
Different homes receive sunlight from different directions.
Think about when you typically use your outdoor space. Morning, afternoon, and evening sun can influence the type and size of awning that will work best.
Understanding sun exposure helps you select an awning that provides practical shade when you need it most.
A professional survey often includes a review of sunlight patterns to optimise performance and comfort.
Step 7: Leave Room for Operation
Retractable awnings require sufficient clearance to open and close smoothly.
Measure the surrounding space to ensure there are no obstacles that could interfere with movement.
If you are considering a motorised awning, allow additional space for electrical components and control systems where required.
Proper clearance contributes to safer operation and longer product lifespan.
When to Seek Professional Assistance
Although measuring your property is a useful starting point, professional surveys remain valuable.
Experienced awning specialists can:
- Verify measurements
- Assess structural suitability
- Recommend appropriate products
- Identify installation challenges
- Ensure compliance with safety requirements
Professional guidance helps reduce uncertainty and provides confidence when investing in a residential awning solution.
Common Measuring Mistakes to Avoid
Several simple errors can affect the success of an awning installation.
Avoid these common mistakes:
- Measuring only the patio area
- Ignoring wall obstructions
- Forgetting projection requirements
- Overlooking installation height
- Estimating measurements instead of using a tape measure
- Failing to account for opening and closing clearance
Careful planning helps prevent these issues and leads to a more successful outcome.
Frequently Asked Questions
How wide should my awning be?
The ideal width depends on the area you want to shade. Many homeowners choose an awning wider than their seating area to maximise coverage.
What is projection on an awning?
Projection is the distance the awning extends outward from the wall when fully opened.
Can I measure for an awning myself?
Yes. Initial measurements can be taken yourself. However, professional verification is recommended before installation.
Why is mounting height important?
Correct mounting height ensures comfortable clearance, proper operation, and an attractive appearance.
Do professional awning companies provide surveys?
Many residential awning specialists offer site surveys to confirm measurements and recommend suitable products.
Final Thoughts
Installing a house awning can transform an outdoor area into a more comfortable and practical extension of your home. However, achieving the best results starts with accurate measurements. By carefully measuring width, projection, height, and surrounding space, you can make informed decisions and select an awning that fits perfectly. Taking the time to plan properly will help ensure a smooth installation process, long-lasting performance, and maximum enjoyment of your outdoor living space.